Weixin Service

 DouYin
 KuaiShou

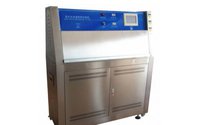
It is worth learning from! PCB reliability test method sharing
Date:2021-04-26 16:47:42 Views:6409
PCB circuit board is the foundation and highway of electronic components, also known as printed circuit board. It is the provider of electrical connection of electronic components. Its development has a history of more than 100 years; Its design is mainly layout design; The main advantage of using circuit board is to greatly reduce wiring and assembly errors, and improve the automation level and production labor rate. The quality of PCB is very important. To check the quality of PCB, a number of reliability tests must be carried out. This article is an introduction to PCB reliability test. Let's have a look.
_20210426164713_453.jpg)
1.Ion contamination test
Purpose: check the quantity of ions on the surface of the circuit board to determine whether the cleanliness of the circuit board is qualified.
Methods: clean the sample surface with 75% propanol. Ions can be dissolved in propanol to change its conductivity. Record the change in conductivity to determine the ion concentration.
Standard: less than or equal to 6.45ug NaCl / sq.in
2.Chemical resistance test of solder mask
Objective: to check the chemical resistance of solder resist film
method:QS (quantum satisfactory) dichloromethane was added dropwise to the sample surface. After a while, wipe the dichloromethane with white cotton. Check whether the cotton is dyed and whether the solder mask is dissolved. Standard: no dye or dissolved.
3.Hardness test of resistance welding layer
Objective: to check the hardness of solder mask
method:Place the circuit board on a flat surface. Scrape a certain range of hardness on the ship with a standard test pen until there is no scratch. Record the minimum hardness of the pencil. Standard: the minimum hardness shall be higher than 6h.
4.Stripping strength test
Purpose: check the force that can strip the copper wire from the circuit board
Equipment: peel strength tester
method:Strip the copper wire at least 10mm from one side of the substrate. Place the sample plate on the tester. Strip the remaining copper wire with a vertical force. Record power. Standard: the stress shall exceed 1.1n/mm.
5.Solderability test
Purpose: check the solderability of pad and through hole on board.
Equipment: soldering machine, oven and timer.
method:Bake the plate in an oven at 105 ℃ for 1 hour. Welding flux. Put the plate into the solder machine at 235 ℃ and take it out. After 3 seconds, the solder pad in the inspection area shall be soaked with tin. Put the plate vertically into a soldering machine at 235 ℃, take it out after 3 seconds, and check whether the through hole is soaked with tin. Standard: the area percentage shall be greater than 95 All through holes shall be tin impregnated.
6.Withstand voltage test
Purpose: to test the withstand voltage ability of circuit board.
Equipment: withstand voltage tester
method:Clean and dry the sample. Connect the circuit board to the tester. Increase the voltage to 500V DC at a speed not higher than 100V / s. Keep it at 500V DC for 30 seconds. Standard: there shall be no fault on the circuit.
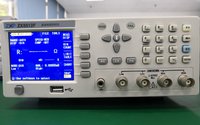
7. Glass transition temperature test
Objective: to check the glass transition temperature of the plate.
Equipment: DSC (differential scanning calorimeter) tester, oven, dryer, electronic scale.
method:Prepare the sample with a weight of 15-25mg. Bake the sample in an oven at 105 ℃ for 2 hours, and then put it into a dryer to cool to room temperature. Put the sample on the sample table of DSC tester and set the heating rate to 20 ℃ / min. Scan twice and record TG. Standard: TG shall be higher than 150 ℃.
8. CTE (coefficient of thermal expansion) test
Objective: evaluate the CTE of the board.
Equipment: TMA (thermomechanical analysis) tester, oven, dryer.
method:Prepare samples with dimensions of 6.35 * 6.35mm. Bake the sample in an oven at 105 ℃ for 2 hours, and then put it into a dryer to cool to room temperature. Put the sample on the sample table of TMA tester, set the heating rate to 10 ℃ / min, and set the final temperature to 250 ℃, and record CTE.
9.Heat resistance test
Objective: To evaluate the heat resistance of plate.
Equipment: TMA (thermomechanical analysis) tester, oven, dryer.
method:Prepare samples with dimensions of 6.35 * 6.35mm. Bake the sample in an oven at 105 ℃ for 2 hours, and then put it into a dryer to cool to room temperature. Put the sample on the sample table of TMA tester and set the heating rate to 10 ℃ / min. Raise the sample temperature to 260 ℃.