Weixin Service

 DouYin
 KuaiShou

How to accurately detect the quality of optocoupler (optocoupler) components
Date:2024-04-08 14:45:54 Views:4864
With the widespread application of optocouplers (referred to as optocouplers) in various electronic devices, ensuring their ability to function properly is crucial. Optocouplers, as an important electrical isolation component, achieve the isolation and conversion of electrical signals through the transmission of light. Correctly detecting the quality of optocoupler components can help engineers promptly troubleshoot faults and avoid potential system issues. Below, we will provide a detailed introduction to several specific methods for detecting the quality of optocouplers.
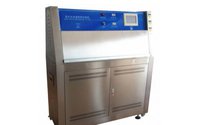
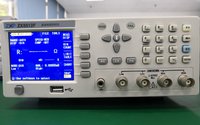
_20240408144422_867.jpg "如何精准检测光电耦合器(光耦)元件的好坏")
Method 1: Appearance and physical inspection
Step 1
Firstly, conduct a visual inspection. Check if there are any cracks, deformations, stains, or burn marks on the optocoupler packaging. Ensure that there is no obvious physical damage on its surface, as these may cause optocoupler failure.
Method 2: Resistance measurement
Step 2
Use a digital multimeter for static resistance measurement. Most optocouplers contain a light-emitting diode (LED) and a photosensitive transistor or other type of photosensitive element. Measure according to the pin distribution of the optocoupler:
The forward resistance (usually low ohmic value at a conduction voltage of 1.2V to 3.3V) and reverse resistance (should be high resistance state) of the input side LED.
The resistance of the output side photosensitive element from the base to the emitter (B-E) and from the collector to the emitter (C-E). Under normal circumstances, the dark resistance between B-E is relatively high, and under illumination, due to the photoelectric effect, there will be a certain collector emitter saturation voltage drop between C-E.
Method 3: Comparative method
Step 3
Compare the resistance value between the optocoupler to be tested and a known good optocoupler of the same model. If the resistance difference between the two is significant, it may indicate that there is a problem with the measured optocoupler.
Method 4: Dynamic Function Testing
Step 4
Apply input signals to activate the internal LED of the optocoupler and measure the response on the output side.
Input side test: By applying an appropriate driving current to the input end of the optocoupler (for example, by connecting to the power supply through a current limiting resistor), observe whether the LED lights up normally.
Output side test:
Connect an oscilloscope or multimeter to the output terminal of the optocoupler and observe the voltage change at the output terminal under the action of the input signal. Under normal circumstances, when an LED emits light, the photosensitive transistor on the output side should generate a corresponding current or voltage output.
If conditions permit, the corresponding output voltage or current under different input current conditions can be measured to ensure that its performance meets the specification range given in the data manual.
Method 5: Online testing in actual circuits
Step 5
For optocouplers already installed on the circuit board, online testing can be conducted without disassembly, but this method may be affected by surrounding circuits. The working condition of the optocoupler can be indirectly evaluated by measuring the voltage or current at the output terminal under normal working conditions, or by changing the input signal and observing the output response.
In summary, the process of detecting the quality of optocouplers is a comprehensive process that combines static resistance measurement, dynamic signal testing, and comparison with other known good components. Only by ensuring that all key indicators are within the normal range can the optocoupler be confirmed to be in good working condition. When performing the above tests, please be sure to refer to the data manual of the corresponding optocoupler model to obtain accurate parameter reference values.