Weixin Service
 DouYin
 KuaiShou

Methods and means of chip failure analysis commonly used in "detection knowledge" Laboratory
Date:2021-10-13 18:27:25 Views:5349
Generally speaking, mistakes in the process of R & D and production of chips are inevitable, just like making up for the lack of room. Where there is a problem, you just have to solve the problem and think about why there is a problem. With the continuous improvement of people's requirements for product quality and reliability, failure analysis is becoming more and more important. The development of society is a process of finding and solving problems. The emergence of problems is not terrible, but the frequent occurrence of the same kind of problems is very terrible. This paper mainly discusses how to carry out effective chip failure analysis solutions and common analysis methods.
Failure analysis is a new developing subject, which has been popularized from military industry to ordinary enterprises in recent years. It is generally based on the failure mode and phenomenon, through analysis and verification, simulate and reproduce the failure phenomenon, find out the cause of failure, and dig out the failure mechanism. Failure analysis is a necessary means to determine the failure mechanism of chip. Failure analysis provides necessary information for effective fault diagnosis. Failure analysis provides necessary feedback information for design engineers to continuously improve or repair the chip design and make it more consistent with the design specification. Failure analysis can evaluate the effectiveness of different test vectors, provide necessary supplements for production testing, and provide necessary information basis for verification and test process optimization.
Common chip failure analysis methods
1: X-ray inspection
1. X-ray means:
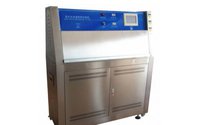
X-ray, also known as roentgen ray, is a kind of electromagnetic radiation with very short wavelength, which was discovered by German physicist roentgen in 1895. It generally refers to the short wave radiation emitted when the electron energy changes greatly, which can pass through many solid substances that ordinary light cannot pass through. The X-ray analyzer in the reliability analysis room can be used to check the gold wire of the product, the pores in the resin, the bubbles in the conductive adhesive under the chip and the distribution range of the conductive adhesive.
2. X-ray inspection principle
Cause or responsible person
Ball stripper assembly
? if a large number of points are the same foot, it is a poor assembly. If the shape of the point stripping wire is regular, it means that the L / F is deformed before assembly or encapsulation, vibrates during operation, the feeding frame is pulled too much, and the L / F moves too much on the heating table. Both processes should be checked. If the radian of the gold wire at the point is similar to the radian of the gold wire next to it, it is caused by assembly.
The overall skew, disorder and breakage # are due to poor encapsulation. The reason is that the mold blowing is not complete, the material cake is stained with raw powder, improper or uneven heating, improper process parameters and abnormal mold washing, resulting in abnormal flow of molding compound in the mold cavity.
Individual gold wires are broken} during assembly or when the product is used, the gold wires are blown.
Only local punching and skewing are mostly caused by excessive action during encapsulation and positioning, when pulling the feeding frame, and some are caused by internal bubbles.
When the collision {radian of gold wire is normal and less than the normal punching skew rate, it is due to improper chip loading or solder joint position
The internal welding pin offset {is mostly the internal pin encountered during assembly.
Most of the broken wires are encountered when arranging sheets.
The distribution of conductive adhesive {should be slightly larger than the chip area and basically symmetrical.
2: Ultrasonic cleaning
1. Cleaning is only used to analyze devices with abnormal electrical performance and failure that may be related to shell or chip surface pollution. At this time, it should be confirmed that there is no leakage in the package in order to remove pollutants on the housing. Before cleaning, remove any sundries on the surface, and then re measure the electrical parameters. If it still fails, clean it again. After cleaning, measure the electrical parameters and compare the changes of electrical parameters before and after cleaning. The cleaning agent that does not damage the shell shall be selected, usually acetone, ethanol and toluene. After cleaning, it shall be cleaned with pure water, and finally dehydrated with acetone and absolute ethanol, and then dried. Cleaning shall ensure that it will not cause failure due to cleaning agent.
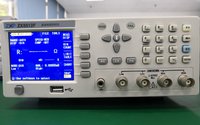
2. Ultrasonic testing and analysis
Sat - ultrasonic waveform display inspection.
Ultrasonic wave refers to the sound wave with a frequency of more than 20kHz (which cannot be heard by human ears, and the sound wave with a frequency lower than 20Hz is called infrasound wave). Its typical characteristics are: 100% reflection when encountering gas, reflection at the interface of different substances, and linear propagation like light.
Sat uses these ultrasonic characteristics to detect the interior of the product to determine whether the product sealing meets the requirements and whether the product has internal separation.
3. Ultrasonic discrimination principle
There must be no separation layer on the chip surface
There shall be no separation layer in the fine pressing area of silver plated foot
The area of the inner pin connected through the separation layer shall not exceed 20% of the area of the colloid front, or the number of pins connected through the separation layer shall not exceed 1 / 5 of the total number of pins
The separation layer caused by conductive adhesive around the chip shall not exceed 2 / 3 of the chip height when passing the reliability test or bscan.
When judging ultrasonic pictures, the waveform shall prevail, and pay attention to the waveform inspection of black-and-white abnormal areas
4. Pay attention during ultrasonic examination
The focus must be right and can be adjusted repeatedly until the scanned image is "flat" and there are no scattered red spots.
Pay attention to the gain. The scanned image cannot be too bright or too dark.
Note that the product shall not be placed upside down, and there shall be no potholes, other impurities and bubbles caused by marks on the product surface.
The probe can be divided into high frequency and low frequency. Different probes are selected for different products (adjusted by the staff of the analysis room). Generally, products with thick resin body adopt low-frequency probe, otherwise adopt high-frequency probe. Poor penetration due to high frequency.

3: Cap / cap opening
1. Under the action of hot concentrated nitric acid (98%) or concentrated sulfuric acid, the polymer resin is decomposed into a low molecular compound easily soluble in acetone. Under the action of ultrasound, the low molecular compound is cleaned to expose the surface of the chip.
2. Cap opening method:
Take a stainless steel plate, lay a thin layer of yellow sand on it (or heat the product directly on the steel plate), heat it on the electric furnace, the sand temperature should reach 100-150 degrees, put the product on the sand, the front of the chip faces upward, and use a straw to absorb a small amount of fuming nitric acid (concentration > 98%). Drop it on the product surface. At this time, the resin surface has a chemical reaction and bubbles appear. After the reaction stops, drop it again. After dropping 5-10 drops continuously, clamp it with tweezers and put it into a beaker containing acetone. After cleaning it in an ultrasonic machine for 2-5 minutes, take it out and drop it again. Repeat this until the chip is exposed. Finally, clean it repeatedly with clean acetone to ensure that there is no residue on the chip surface.
Boil all products in 98% concentrated sulfuric acid at one time. This method is more suitable for the case of large quantity and only depending on whether the chip is broken. The disadvantage is that the operation is dangerous. Master the essentials.
3. Precautions for opening cap:
All operations shall be carried out in the fume hood and acid proof gloves shall be worn.
The more the product is opened, the less acid should be dropped and cleaned frequently to avoid excessive corrosion.
During cleaning, the tweezers shall not touch the gold wire and chip surface to avoid scratching the chip and gold wire.
According to the product or analysis requirements, some conductive adhesive under the chip shall be exposed after opening the cap, Or the second point
In addition, in some cases, the open cap products shall be retested according to the row. At this time, first observe whether the gold wire on the chip is broken and collapsed under an 80x microscope. If not, scrape the black film on the pin with a blade and send it for measurement.
Pay attention to control the opening temperature not too high.
4. Common acids in analysis:
Concentrated sulfuric acid. This refers to 98% concentrated sulfuric acid, which has strong dehydration, water absorption and oxidation. When opening the cap, it is used to cook a large number of products at one time. Here, its dehydration and strong oxidation are used.
Concentrated hydrochloric acid. It refers to 37% (V / V) hydrochloric acid with strong volatility and oxidation. It is used to remove the aluminum layer on the chip in the analysis.
Fuming nitric acid refers to nitric acid with a concentration of 98% (V / V). To open the hat. It has strong volatility and oxidation, and is reddish brown due to the dissolution of NO2.
Aqua regia refers to a mixture of one volume of concentrated nitric acid and three volumes of concentrated hydrochloric acid. It is used to rot gold ball in analysis because it is highly corrosive and can corrode gold.
4: Internal visual inspection:
1. Depending on the product, carefully observe whether there are cracks, broken aluminum, scratches, burns, contamination and other abnormalities on the chip surface under a 200 or 500 times metallographic microscope or a three-dimensional microscope. For chip cracks, the cap shall be opened from the reverse side to observe whether the thimble is broken when the chip is installed on the reverse side, because it is easy to break the chip when the cap is opened on the front side to remove the chip. The conductive adhesive on the reverse side can be slowly corroded with nitric acid, and then gently scraped off with soft fine copper wire.
2. Rotten ball analysis
Place the opened product in 10% - 20% KOH (or NaOH) solution heated to boiling or aqua regia heated to boiling (i.e. 3:1 mixed solution of concentrated hydrochloric acid and concentrated nitric acid). Soak for about 3 to 5 minutes (individual products require a longer soaking time, up to more than 10 minutes). Gently remove the gold wire from the chip with a fine needle under a 100 to 200 times microscope (be careful not to touch the chip). If the gold ball is still firmly stuck to the chip, it means that it needs to rot the ball again. Do not pull the gold wire hard to avoid creating artificial pits and causing miscalculation.
3. Contents to be checked during analysis
5: External visual inspection
1. Content: whether there are resin cracks, short circuit caused by sundries between pins, whether pins are pulled out of resin, whether copper is exposed at the root of pins, whether pins and resin are contaminated, whether pins are bent and deformed, etc.
X-ray # whether there are ball off, spot off, overall punching skew, gold wire disorder, broken, local punching skew, wire collapse, gold wire collision, welding foot offset, colloid cavity, solder cavity, solder coverage area, whether there are sundries between pins, resulting in pin short circuit and other abnormalities.
Ultrasonic testing. Whether there is internal separation between the chip surface, the second point of the bonding line, the colloid and the lead frame, etc.
2. Internal visual inspection after opening the cap.
(1) Check with 30-50x stereomicroscope: the bonding line is too long and collapses, damaging the chip; The tail of bonding wire is too long to cause short circuit; The neck of the bonding wire is damaged or the lead wire is broken; The bonding point or bonding wire is corroded; The bonding point is as small as possible or the position is improper; Improper amount of chip bonding material or cracks; Chip lifting, improper chip orientation and chip crack; Excess bonding wire ends or foreign particles, etc.
(2) Metallization, thin film resistor defects are inspected under 50-200 times microscope, mainly including corrosion, burning and serious mechanical damage; Lithography defects, electromigration, too thin metallization layer, broken aluminum step, rough and blackened surface, foreign contamination, etc.
(3) The contact holes covered by metallization are incomplete, the defects of oxide layer / passivation layer appear under the metallization strip or in the active area, and the passivation layer is cracked or scratched.
Rot ball analysis. The main purpose is to check whether the process used in ball welding has adverse effects on the pressure welding area, such as crater, i.e. pressure zone fracture. At this time, other parts can be inspected and ignored.
The above is the related content of "chip failure analysis" brought by the core creation test. I hope it can be helpful to you. We will bring more wonderful content in the later stage. The company's testing services cover: electronic component testing and verification, IC authenticity identification, product design and material selection, failure analysis, function testing, factory incoming material inspection, tape braiding and other testing items. Welcome to call Chuangxin testing, we will serve you wholeheartedly.