Weixin Service

 DouYin
 KuaiShou

What are the steps for chip testing?
Date:2024-07-11 16:00:00 Views:2685
Chip testing is a crucial step in ensuring the quality and performance of chips. Next, let me briefly introduce the common steps of chip detection:
Preparation work for one of the chip detection steps:
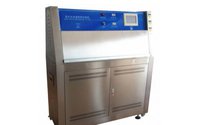
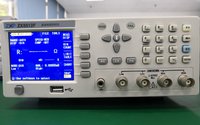
Collect the necessary equipment and tools, including chip samples, microscopes, testing equipment (such as test needles and oscilloscopes), computers, etc.
Chip Testing Step 2: Chip Sample:
Ensure that the chip sample is clean and dust-free to avoid any contamination or external interference that may affect the test results.
Chip detection step three: Connect the testing equipment:
Connect the testing device to the computer and ensure that the device's driver is installed correctly.
Place the chip under a microscope: Use a microscope to place the chip in an observable position. Adjust the microscope to obtain a clear view.
Step 4 of chip inspection: Check the appearance of the chip:
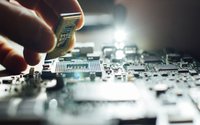
Carefully observe the appearance of the chip, including pads, pins, and circuit structure. Search for any visible damage, defects, or abnormalities.
Step 5 of chip testing for electrical performance testing:
Connect the pins of the chip to the corresponding testing instruments using test pins, and then perform electrical performance tests such as voltage testing, current testing, and signal transmission testing.
Step 6 of chip testing analysis test results:
Evaluate the electrical performance of the chip based on the readings and displays of the testing instrument, and record the test results.
Report and summary of the seventh step of chip detection:
Write a chip inspection report based on the test results, summarizing the performance, defects, and usability of the chip.