Summary of common methods for basic component testing
Date:2022-01-10 14:50:26 Views:2296
Electronic component testing is the application of testing service industry technology in electronic information industry. It is an important link in the specific industrial chain of electronic components. The level of testing service technology is closely related to the quality of electronic components. Especially for beginners, it is necessary to master the testing methods and experience of common electronic components. The following introduces the testing experience and methods of common electronic components for your reference.
1、 Testing methods and experience of resistors:

1. Detection of fixed resistors
A. Connect the two probes (regardless of positive and negative) with the pins at both ends of the resistance to measure the actual resistance value. In order to improve the measurement accuracy, the measuring range should be selected according to the nominal value of the measured resistance. Due to the nonlinear relationship of Ohm scale, the division of the middle section is relatively fine. Therefore, the pointer indication value should fall to the middle section of the scale as far as possible, that is, within 20% ~ 80% radian range at the beginning of the full scale, so as to make the measurement more accurate. According to the resistance error level. Errors of ± 5%, ± 10% or ± 20% are allowed between the reading and the nominal resistance value respectively. If it is inconsistent and exceeds the error range, it indicates that the resistance value has changed.
B. Note: during the test, especially when measuring the resistance of more than tens of K Ω, do not touch the probe and the conductive part of the resistance; At least one end of the detected resistance shall be welded off from the circuit to prevent other components in the circuit from affecting the test and causing measurement error; Although the resistance value of the color ring resistance can be determined by the color ring mark, it is best to use a multimeter to test its actual resistance value.
2. Detection of cement resistance
The method and precautions for testing cement resistance are exactly the same as those for testing ordinary fixed resistance.
3. Detection of fused resistors
In the circuit, when the fusing resistor is fused and open circuit, it can be judged according to experience: if the surface of the fusing resistor is found to be blackened or charred, it can be determined that it is caused by its overload and the current passing through it exceeds many times the rated value; If there is no trace on its surface and there is an open circuit, it indicates that the current flowing is just equal to or slightly greater than its rated fusing value. For the judgment of the quality of the fused resistor without any trace on the surface, the multimeter R can be used × To ensure accurate measurement, one end of the fuse resistor shall be welded off the circuit. If the measured resistance value is infinite, it indicates that the fusing resistor has failed and open circuit. If the measured resistance value is far from the nominal value, it indicates that the resistance has changed and should not be used again. In the maintenance practice, it is found that a few fuse resistors are broken down and short circuited in the circuit, which should also be paid attention to during detection.
4. Detection of potentiometer
When checking the potentiometer, first turn the handle to see whether the handle rotates smoothly, whether the switch is flexible, whether the "click" sound is clear when the switch is on and off, and listen to the friction sound between the internal contact point of the potentiometer and the resistor. If there is a "rustle" sound, it indicates that the quality is not good. When testing with a multimeter, first select the appropriate resistance gear of the multimeter according to the resistance value of the potentiometer to be measured, and then test according to the following methods.
A. Use the ohm block of the multimeter to measure both ends of "1" and "2", and its reading should be the nominal resistance value of the potentiometer. If the pointer of the multimeter does not move or the resistance value is much different, it indicates that the potentiometer has been damaged.
B. Check whether the movable arm of the potentiometer is in good contact with the resistor. Measure both ends of "1" and "2" (or "2" and "3") with the ohm gear of the multimeter, and rotate the rotating shaft of the potentiometer counterclockwise to close to the "off" position. At this time, the smaller the resistance value, the better. Then rotate the shaft handle slowly clockwise, the resistance value should gradually increase, and the pointer in the meter should move smoothly. When the shaft handle is rotated to the extreme position "3", the resistance value shall be close to the nominal value of the potentiometer. If the pointer of the multimeter jumps during the rotation of the shaft handle of the potentiometer, it indicates that the movable contact has the fault of poor contact.
5. Detection of positive temperature coefficient thermistor (PTC)
When testing, use multimeter R × Gear 1, which can be operated in two steps:
A. Normal temperature detection (indoor temperature close to 25 ℃); Contact the two probes with the two pins of the PTC thermistor, measure the actual resistance value, and compare it with the nominal resistance value. If the difference between the two is within ± 2 Ω, it is normal. If the difference between the actual resistance value and the nominal resistance value is too large, it indicates that its performance is poor or damaged.
B. Heating detection; On the basis that the normal temperature test is normal, the second step of test heating test can be carried out. Heat a heat source (such as electric soldering iron) close to the PTC thermistor, and monitor whether the resistance value increases with the increase of temperature with a multimeter. If so, it indicates that the thermistor is normal. If the resistance value does not change, it indicates that its performance has deteriorated and can not be used anymore. Be careful not to make the heat source close to the PTC thermistor or directly contact the thermistor to prevent it from being burned.
6. Detection of negative temperature coefficient thermistor (NTC)
(1) . measure the nominal resistance RT
The method of measuring NTC thermistor with multimeter is the same as that of ordinary fixed resistance, that is, the actual value of RT can be measured directly by selecting an appropriate resistance block according to the nominal resistance value of NTC thermistor. However, NTC thermistor is very sensitive to temperature, so the following points should be paid attention to during the test:
A. RT is measured by the manufacturer when the ambient temperature is 25 ℃, so when measuring RT with a multimeter, it should also be carried out when the ambient temperature is close to 25 ℃ to ensure the reliability of the test.
B. The measured power shall not exceed the specified value to avoid measurement error caused by current thermal effect.
C. Pay attention to correct operation. During the test, do not hold the thermistor with your hands to prevent the human body temperature from affecting the test.
(2) . estimated temperature coefficient α t
First measure the resistance value RT1 at room temperature T1, then use an electric soldering iron as a heat source, close to the thermistor RT, measure the resistance value rt2, and use a thermometer to measure the average temperature T2 on the surface of the thermistor RT at this time, and then calculate.
7. Detection of varistor
Use the R of the multimeter × 1K gear measures the forward and reverse insulation resistance between the two pins of the varistor, which is infinite. Otherwise, it indicates that the leakage current is large. If the measured resistance is very small, the varistor has been damaged and cannot be used.
8. Detection of photosensitive resistance
A. Cover the light transmission window of the photoresist with a piece of black paper. At this time, the pointer of the multimeter basically remains motionless, and the resistance value is close to infinity. The higher the value, the better the photoresist performance. If this value is very small or close to zero, it indicates that the photoresist has been burned through and damaged and can no longer be used.
B. Aim a light source at the light transmission window of the photoresist. At this time, the pointer of the multimeter should swing greatly, and the resistance value should be significantly reduced. The more obvious this value is, the better the performance of the photoresist is. If this value is very large or even infinite, it indicates that the photoresist is internally open circuit damaged and can no longer be used.
C. Shine light on the light transmission window of the photoresist, and shake the small black paper on the upper part of the light shielding window of the photoresist to make it receive light intermittently. At this time, the multimeter pointer should swing left and right with the shaking of the black paper. If the pointer of the multimeter always stops at a certain position and does not swing with the shaking of the paper, it indicates that the photosensitive material of the photosensitive resistance has been damaged.
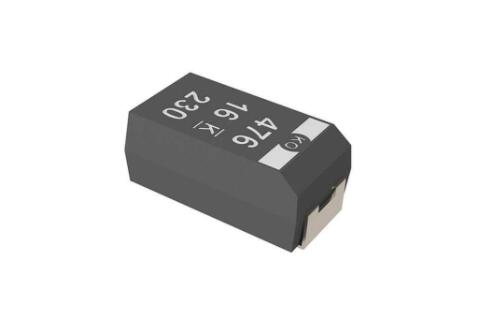
2、 Testing methods and experience of capacitors
1. Detection of fixed capacitor
A. Detect small capacitance below 10PF
Because the capacity of fixed capacitors below 10PF is too small, it can only be qualitatively checked for leakage, internal short circuit or breakdown when measured with a multimeter. Multimeter R can be selected for measurement × 10K gear, use two probes to connect the two pins of the capacitor arbitrarily, and the resistance value shall be infinite. If the measured resistance value (the pointer swings to the right) is zero, it indicates that the capacitor is damaged by leakage or internal breakdown.
B. Test 10PF ~ 0.01 μ F check whether the fixed capacitor is charged, and then judge whether it is good or bad. R is selected for multimeter × 1K gear. Two triodes β The values are above 100, and the penetration current should be small. 3DG6 and other models of silicon triode can be selected to form a composite tube. The red and black probes of the multimeter are connected with the emitter E and collector C of the composite tube respectively. Due to the amplification of the composite triode, the charging and discharging process of the measured capacitor is amplified, so that the swing range of the multimeter pointer is increased, which is convenient for observation. It should be noted that during the test operation, especially when measuring the capacitance of small capacity, it is necessary to repeatedly exchange the measured capacitance pin to contact two points a and B, so as to clearly see the swing of the multimeter pointer.
C. For 0.01 μ For fixed capacitance above F, R of multimeter can be used × 10K gear directly tests whether the capacitor has charging process and internal short circuit or leakage, and the capacity of the capacitor can be estimated according to the amplitude of the pointer swinging to the right.
2. Detection of electrolytic capacitor
A. Because the capacity of electrolytic capacitor is much larger than that of general fixed capacitor, appropriate measuring range shall be selected for different capacities during measurement. According to experience, generally, 1 ~ 47 μ Capacitance between F, R can be used × 1K gear measurement, greater than 47 μ The capacitance of F can be used as R × 100 gear measurement.
B. Connect the red lead of the multimeter to the negative electrode and the black lead to the positive electrode. At the moment of contact, the multimeter pointer deflects to the right by a large amplitude (for the same electrical barrier, the greater the capacity, the greater the swing), and then gradually turn to the left until it stops at a certain position. The resistance at this time is the forward leakage resistance of the electrolytic capacitor, which is slightly greater than the reverse leakage resistance. The practical application experience shows that the leakage resistance of electrolytic capacitor should generally be more than several hundred K Ω, otherwise it will not work normally. In the test, if there is no charging phenomenon in the forward and reverse directions, that is, the gauge needle does not move, it indicates that the capacity disappears or the internal circuit is open; If the measured resistance value is very small or zero, it indicates that the capacitor has large leakage or has been broken down and damaged and can not be used again.
C. For electrolytic capacitors with unclear positive and negative marks, the above method of measuring leakage resistance can be used to distinguish. That is, measure the leakage resistance arbitrarily, remember its size, and then exchange the probes to measure a resistance value. The one with the largest resistance in the two measurements is the positive connection method, that is, the black probe is connected to the positive electrode and the red probe is connected to the negative electrode.
D. The capacity of the electrolytic capacitor can be estimated and measured by using the resistance block of the multimeter and the method of charging the electrolytic capacitor in the forward and reverse directions. According to the swing range of the pointer to the right.
3. Detection of variable capacitor
A. Rotate the rotating shaft gently by hand. It should feel very smooth. It should not feel sometimes loose, sometimes tight, or even stuck. When the rotating shaft is pushed forward, backward, up, down, left, right and other directions, the rotating shaft shall not be loose.
B. Rotate the rotating shaft with one hand and gently touch the outer edge of the moving plate group with the other hand. There should be no looseness. The variable capacitor with poor contact between the rotating shaft and the moving plate can no longer be used.
C. Place the multimeter in R × At 10K gear, connect the two probes to the leading out ends of the moving piece and the fixed piece of the variable capacitor with one hand, and slowly rotate the rotating shaft several times with the other hand. The pointer of the multimeter shall not move at infinity. In the process of rotating the rotating shaft, if the pointer sometimes points to zero, there is a short-circuit point between the moving plate and the fixed plate; If a certain angle is encountered, the reading of the multimeter is not infinite, but a certain resistance value appears, indicating that there is leakage between the moving piece and the fixed piece of the variable capacitor.
3、 Testing methods and experience of inductors and transformers
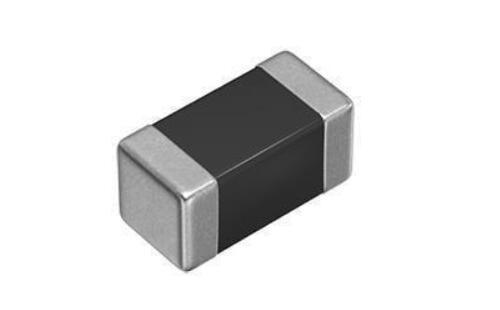
1. Detection of color code inductor
Place the multimeter in R × In gear 1, the red and black probes are respectively connected to any leading out end of the color code inductor. At this time, the pointer should swing to the right. According to the measured resistance value, it can be identified in the following three cases:
A. The resistance value of the measured color code inductor is zero, and there is a short-circuit fault in it.
B. The DC resistance value of the measured color code inductor is directly related to the diameter of the enameled wire used to wind the inductor coil and the number of turns. As long as the resistance value can be measured, the measured color code inductor can be considered normal.
2. Detection of mid cycle transformer
A. Turn the multimeter to R × In gear 1, check the on-off condition of each winding one by one according to the pin arrangement law of each winding of the mid cycle transformer, and then judge whether it is normal.
B. Test insulation performance
Place the multimeter in R × 10K gear, conduct the following state tests:
(1) Resistance between primary winding and secondary winding;
(2) Resistance between primary winding and shell;
(3) The resistance between the secondary winding and the housing.
The above test results are divided into three cases:
(1) The resistance is infinite: normal;
(2) Resistance value is zero: there is short-circuit fault;
(3) Resistance value is less than infinity but greater than zero: there is leakage fault.
3. Detection of power transformer
A. Check whether there are obvious abnormalities by observing the appearance of the transformer. For example, whether the coil lead is broken, desoldered, whether the insulating material is burnt, whether the iron core fastening screw is loose, whether the silicon steel sheet is rusted, whether the winding coil is exposed, etc.
B. Insulation performance test. Multimeter R × 10K gear shall measure the resistance between iron core and primary, primary and secondary, iron core and secondary, electrostatic shielding layer and secondary and secondary windings respectively. The multimeter pointer shall point to the infinity position. Otherwise, the insulation performance of the transformer is poor.
C. Coil on-off detection. Place the multimeter in R × Gear 1: in the test, if the resistance value of a winding is infinite, it indicates that the winding has open circuit fault.
D. Distinguish primary and secondary coils. The primary and secondary pins of the power transformer are generally led out from both sides, and the primary winding is mostly marked with the word 220V, while the secondary winding is marked with the rated voltage, such as 15V, 24V, 35V, etc. Then identify according to these marks.
E. Detection of no-load current.
(a) Direct measurement method.
Open all secondary windings, Put the multimeter in AC current (500mA, in series into the primary winding. When the plug of the primary winding is plugged into 220V AC mains power, the multimeter indicates the no-load current value. This value shall not be greater than 10% ~ 20% of the full load current of the transformer. The normal no-load current of the power transformer of common electronic equipment shall be about 100mA. If it exceeds too much, it indicates that the transformer has short-circuit fault.
(b) Indirect measurement.
A 10 ∧ / 5W resistor is connected in series in the primary winding of the transformer, and all secondary windings are still no-load. Turn the multimeter to AC voltage. After power on, use two probes to measure the voltage drop u at both ends of resistance R, and then use Ohm's law to calculate the no-load current I empty, that is, I empty = u / R.
F. No load voltage detection. Connect the primary of the power transformer to 220V mains power, and connect the AC voltage of the multimeter. The no-load voltage values (U21, u22, U23 and u24) of each winding shall meet the requirements. The allowable error range is generally: high voltage winding ≤± 10%, low voltage winding ≤± 5%, and the voltage difference between two groups of symmetrical windings with center tap shall be ≤± 2%.
G. Generally, the allowable temperature rise of low-power power transformer is 40 ℃ ~ 50 ℃. If the insulating material used is of good quality, the allowable temperature rise can be improved.
H. Detect and judge the same name end of each winding. When using a power transformer, sometimes two or more secondary windings can be used in series in order to obtain the required secondary voltage. When using the power transformer in series, the same name end of each winding in series must be correctly connected without mistake. Otherwise, the transformer will not work properly.
4. Comprehensive detection and discrimination of short circuit fault of power transformer
The main symptoms of short-circuit fault of power transformer are serious heating and abnormal output voltage of secondary winding. Generally, the more inter turn short-circuit points in the coil, the greater the short-circuit current, and the more serious the heating of the transformer. A simple way to detect and judge whether there is a short-circuit fault in the power transformer is to measure the no-load current (the test method has been introduced earlier). The no-load current of the transformer with short-circuit fault will be much greater than 10% of the full load current. When the short circuit is serious, the transformer will heat rapidly within tens of seconds after no-load power on. Touching the iron core with your hand will feel hot. At this time, it can be concluded that there is a short-circuit point in the transformer without measuring the no-load current.
The above is the related content of "basic component testing" brought by the core creation test. I hope it can be helpful to you. We will bring more wonderful content in the later stage. The company's testing services cover: electronic component testing and verification, IC authenticity identification, product design and material selection, failure analysis, function testing, factory incoming material inspection, tape braiding and other testing items. Welcome to call Chuangxin testing, we will serve you wholeheartedly.


 Weixin Service

 DouYin
 KuaiShou


